Here is a recipe from another sister, I am not sure where she got it from. So good. My husband hates sweet potatoes but he ate this and said it was good. It is that good.
3 cups sweet potatoes
1 cup sugar
1/2 cup milk
4 T melted butter
1/2 tsp salt
2 eggs
1 tsp vanilla
1/2 tsp cinnamon
Topping
4 T melted butter
1 cup brown sugar
1 cup chopped pecans
Instructions:
Cook sweet potatoes, I put mine in the oven until they are well cooked let them cool and then peel off skins with my fingers no knife needed. Put them in a bowl add rest of ingredient (minus the topping ones) and mix together with mixer. It will be creamy. Fill a casserole dish. Then mix together topping ingredients and spread over sweet potatoes.
I probably use twice as much sweet potatoes as called for so I get more vegetable value and sugar.
Enjoy!
Once you make these, you will never go back. Trust me.
Thursday, December 23, 2010
Pomegranate Salsa
Here is a super delish recipe that one of my sister's made a year or so ago and I could eat the whole thing. You can't judge until you try it.
3 T Fresh squeezed lime juice
2 T honey
1/2 tsp salt
2 med avocados peeled and diced
2 med oranges, peeled and sectioned
1 pomegranate seeded
1/4 c sliced green onions
1/4 c chopped fresh cilantro
1 jalapeno pepper seeded and minced
Here are the real instructions.
Mix lime juice, honey, and salt. Dump avocados into this mixture. In a separate bowl, peel and section oranges and then cut them into chunks. Seed the pomegranate and put the onions, cilantro and jalapeno pepper into the oranges bowl. Finally pour the lime mixture over the pomegranate mixture and toss.
Here is what I do.
Dump all into a bowl and mix until well mixed.
Serve with chips.
Hint: Cut your pomegranate in half and fill a bowl of water and seed under the water. It is much easier to get them all out under the water.
Enjoy in the delish!
Wednesday, November 10, 2010
Summer shirts to....Winter Shirts!
I am so excited about this one. I have had this in my head for a long time and now it's out.
Have any of you noticed the trends with long sleeve shirts lately?
What I am talking about is the sleeves. They look like a short sleeve shirt with a long sleeve underneath in a different color, print, or fabric. Will one day while I was out shopping for winter shirts I noticed this (it was actually months ago). My son has a bunch of summer shirts that aren't quite too small yet and are still useable but next summer they will be too small.
The solution??
Make long sleeves. This is so simple and you can do it no matter what size shirt. Heck, you could do this to your husband's shirts if you wanted too. Mine would be less than thrilled if I did this to his shirts. But nevertheless you can always try.
Here are the directions:
First, pick out the shirt that you want to use. Lay it out flat and measure the opening of the sleeve. So layed flat, if it was 3 1/2 inches wide then you would need 7 inches wide. Then using a long sleeve shirt as a pattern I measured how long I needed the rest of my sleeve. For example, if the sleeve on the short sleeve shirt from the shoulder seam was 4 inches and the sleeve from the long sleeve shirt was 12 inches then you would need to cut your sleeve that you are going to add 8 inches plus 1 inch of overlap for a total of 9 inches.
With all of your measurements ready it is time to start cutting. I went to a thrift store months ago with this project in mind and found men's t-shirts in the the best condition as possible and for cheap as possible. I got most of mine for a buck. I made sure they had neck ribbing on in case I wanted to add ribbing to the sleeves. With that done, I laid the t-shirt out and took my measurements of the sleeve that I wanted and started cutting.
Make sure you cut your sleeve out on a fold so you don't have a seam on top and bottom of the sleeve. I cut my sleeves from the bottom corners of the sleeves so I could use the hem from the bottom of the shirt as the hem for my sleeves. I also tapered the sleeve so that it would be not as wide near the wrist. You can make it the same width all the way down or taper it. Be careful not to taper it too much or it will be too tight.
These turned out so great and I saved money too. Always a plus if you ask me. A beginner could totally do this. It took about 5 minutes start to finish. Happy long sleeving all of your shirts!!
Note: The lighting in my sewing room is really terrible. Waiting for a new light.
Have any of you noticed the trends with long sleeve shirts lately?
What I am talking about is the sleeves. They look like a short sleeve shirt with a long sleeve underneath in a different color, print, or fabric. Will one day while I was out shopping for winter shirts I noticed this (it was actually months ago). My son has a bunch of summer shirts that aren't quite too small yet and are still useable but next summer they will be too small.
The solution??
Make long sleeves. This is so simple and you can do it no matter what size shirt. Heck, you could do this to your husband's shirts if you wanted too. Mine would be less than thrilled if I did this to his shirts. But nevertheless you can always try.
Here are the directions:
First, pick out the shirt that you want to use. Lay it out flat and measure the opening of the sleeve. So layed flat, if it was 3 1/2 inches wide then you would need 7 inches wide. Then using a long sleeve shirt as a pattern I measured how long I needed the rest of my sleeve. For example, if the sleeve on the short sleeve shirt from the shoulder seam was 4 inches and the sleeve from the long sleeve shirt was 12 inches then you would need to cut your sleeve that you are going to add 8 inches plus 1 inch of overlap for a total of 9 inches.
With all of your measurements ready it is time to start cutting. I went to a thrift store months ago with this project in mind and found men's t-shirts in the the best condition as possible and for cheap as possible. I got most of mine for a buck. I made sure they had neck ribbing on in case I wanted to add ribbing to the sleeves. With that done, I laid the t-shirt out and took my measurements of the sleeve that I wanted and started cutting.
Make sure you cut your sleeve out on a fold so you don't have a seam on top and bottom of the sleeve. I cut my sleeves from the bottom corners of the sleeves so I could use the hem from the bottom of the shirt as the hem for my sleeves. I also tapered the sleeve so that it would be not as wide near the wrist. You can make it the same width all the way down or taper it. Be careful not to taper it too much or it will be too tight.
Once you have your sleeve cut out, turn right sides together and sew starting at the hem and going along the edge. I used a serger. The nice thing about knit is that is doesn't fray. Once I had a sleeve looking thing, I pinned the long sleeve into the short sleeve and sewed around it.
On most all sleeves unless it is not hemmed they have a hem line. I sewed directly on the seam of the previous hem line in a matching thread so you would never know it was added later. Once you have sewed your sleeve on you are done, unless you added the ribbing for the hem. The sewing was a bit tricky and you had to maneuver it carefully so you don't sew the sleeve together.
These turned out so great and I saved money too. Always a plus if you ask me. A beginner could totally do this. It took about 5 minutes start to finish. Happy long sleeving all of your shirts!!
Note: The lighting in my sewing room is really terrible. Waiting for a new light.
Thursday, October 21, 2010
Chicken Cutlets with Basil Parsley Sauce
Chicken Cutlets with Basil-Parsley Sauce
This is from Rachael Ray, I wish I could claim it but I really do not have those kind of skills.
Ingredients
- 2 pounds chicken cutlets
- Salt and pepper
- 3 to 4 tablespoons all-purpose flour
- 1 cup Italian bread crumbs
- 1/3 to 1/2 cup grated Parmigiano, a couple of handfuls
- 1 teaspoon crushed red pepper flakes
- 2 teaspoons poultry seasoning
- 1 clove garlic
- 1 (3-ounce) jar pine nuts (pignoli)
- 1 lemon, zested
- 2 eggs, beaten
- Olive oil, for shallow frying
Basil- Parsley Sauce:
- 1 cup loosely packed basil leaves
- 1/2 cup loosely packed parsley leaves
- 1/2 lemon, juiced
- Salt and freshly ground black pepper
- 1/4 cup extra-virgin olive oil, eyeball it
- 1 Roma or plum tomato, seeded and finely chopped, for garnish
Directions
Season the cutlets with salt and pepper on both sides turn lightly in flour.Combine next 7 ingredients in food processor and pulse-process the crumbs to chop the spices, garlic and nuts and evenly distribute the flavors throughout the crumb and cheese mixture. Transfer the mixture to a plate. Beat eggs in a separate shallow dish.
Heat a thin layer of oil in a large skillet, just enough to coat the bottom of the pan, over medium to medium high heat. Coat the cutlets in eggs then breading and add to the hot oil. Cook cutlets in a single layer, in 2 batches if necessary, about 3 or 4 minutes on each side, until cutlets' juices run clear and breading is evenly browned.
Return food processor bowl to base and add basil, parsley and lemon juice. Add a little salt and pepper. Turn processor on and stream in oil until a loose paste forms.
Serve chicken cutlets with a generous amount of basil and parsley sauce poured over the cutlets. Garnish the chicken with finely chopped Roma tomato. Serve Cheesy Risi e Bisi alongside.
I did not serve with Cheesy Risi e Bisi because peas and rice to me do not mix. Plain rice was fabulous.
Monday, October 11, 2010
Prize Winning Pumpkin Chocolate Chip Muffins...Totally lowfat...Just like Great Harvest's
They are not really prize winning but they should be and they are to me each time I eat them. I said low fat but I am pretty sure they are fat free after all candy corn is.
4 eggs
2 cups sugar
1 16 oz pumpkin
1 tsp vanilla
1 1/4 cup vegetable oil (I always use half applesauce)
3 cups flour
2 tsp baking soda
2 tsp baking powder
2 tsp cinnamon
1 tsp salt
12 oz chocolate chips (I am fairly certain I use way more than that, that is waht makes them fat free)
Bake at 400 degrees for 16-20 minutes. Here is my tip. I love them at Great Harvest how they are huge. So I always fill my muffin cups to the top so they are huge muffins. Love them so much. I Think I could eat them everyday.
Saturday, October 9, 2010
Halloween Shirts
Here are some Halloween shirts that I made from one shirt I got at a thrift store. I used the sayings on the shirt and then made one entire shirt out of the original shirt for my daughter. Due to some cutting on the shirts by my adorable 2 year old, my daughters shirt is not very straight. And because I can't find my normal needles I have yet to put the eyes on the mummy on my sons shirt. Hopefully we will get some good use out of the them at least for the month.
Fall Garland
Here is a simple Fall Garland that I put together today. It was very simple to do and turned out great.
Supplies Needed:
Styrofoam pumpkins or gourds
Ribbon (can use jute)
fake leaves
glue gun
large yard needle
drill and drill bit
Okay, first I gathered my supplies and then with the drill and drill bit, I drilled through the middle of my pumpkins and gourds. Then I wanted to use jute but I could not find mine anywhere in the house. I had some orange polka dot ribbon that is 3/8 inch wide. I threaded my large yarn needle with the ribbon and threaded through the pumpkin and gourds. I had to use a little thing to push my needle through. Once I got that done, I made sure there 6-10 inches between each fruit item. Are pumpkins a fruit or a vegetable? Not really relevant I guess. Then I started gluing the leaves between the fruits. I made a loop on each end of the garland and hung it up. When I looked at it hanging up some of the ribbon was all twisted and such so I glued some more leaves on both sides of the ribbon so when it twisted you wouldn't see the veins on the leaves. It really added to my lack of Halloween decor items.
Thursday, September 9, 2010
Happy Weekend!
This weekend me and the hubs are going south. I am so excited because their is this thrift store down there that I could and do spend hours in. Last time my sisters and I spent about 3 hours and $150 between all of us. It is really that good. I am not looking for anything big like furniture but some additional dress up stuff and anything that hits my fancy. Deep down I would like a Fuschia-purpleish bag but that is not very probable that I will find that. Hopefully, I can find some fall stuff to play around with. Hope you all enjoy your weekend and happy crafting.
Wednesday, September 8, 2010
Make Christmas
A few years ago, I sat back after Christmas and realized I spend entirely way too much at Christmas time. I thought to myself that I am a fairly talented person I should be able to make most of my gifts. So, since then I try to do my very best and make all of my Christmas gifts. Not only does it save money, I get to enjoy something that I love to do. I usually sew a lot of things, make crusty bread for my dad, home decor items and so on.
This year I just discovered my daughter is really into the dress up. For Christmas this year she is getting dress up clothes, shoes, tiaras, necklaces and so forth. Well, I thought a lot about my son and decided we are going to do that for him too. He mostly likes to wear my daughter's stuff. I have gotten a few things like the shoes and I hit a gold mine at the dollar store for pirate, knight, and army stuff. Oh, I got a fireman's hat too. Now I just need to fill in the rest with the clothes. Dresses, skirts, gloves for the daughter, and scrubs, vests, chaps, pants for the son. For the rest of the family, haven't got quite that far yet. I am working on it though. I do have a few items. For the family we draw they ususally always get pajama pants, or holiday pillowcases or something like that.
So, I was wondering do you make Christmas? If so, what do you make? Are you an early shopper or a day before shopper?
Let me know, I am always looking for new ideas and we can share back and forth with everyone.
Happy Making Christmas!
Next time I Post will be fall related. I hope
Thursday, August 26, 2010
Alphabet book Brooke Style
My daughter is 4 and learning to write her letters. She is kind of struggling a little bit so I had this brilliant idea (I thought so anyway) way back in June and finished it August. It didn't take me that long literally, I just have been busy.
Supplies Needed
variety of cardstock 8.5 X 11 cut in half hamburger style
writing paper with the lines and dots on it
glue stick
stickers
laminator or get it laminated
book rings
dry erase or vis a vis wet marker
Okay. First, I decided on what colors I wanted to use. I chose a variety of pinks, purples, greens, yellows, and a cream color. Not very gender neutral but the boy will use it too if it makes it that long. I cut them in half hamburger style.
Once I got that done, I cut out of the writing paper rectangles to fit on the bottom of the paper. I think mine were about 3X4 ish. I made it so there were 3 lines on it. I glued it to the bottom half of the paper. Then with a sharpie I wrote all the alphabet, one letter on each card. First in solid lines on the first row, on the second row with dots, the third row nothing. I did that for each letter, each number 0-9, her name, brother's name, and mom and dad's name. Once I got that done, you can add your stickers as you like. Initially, I was going to cut all the letters out of felt and sew them on so that she could have something to trace but I started doing that with the letter A and it was very difficult so I stopped. Then I took them somewhere to get them laminated. Once they were laminated, I punched a hole in the corner of each one and put a book ring through them.
My daughter loves them, she is not to the point where she can do the third line yet. It makes her feel good that she can write the letters. She still needs lots of work. On the top of the paper she can draw things that start with the letter for example and apple for A. My daughter just mostly draws smiley faces because that is what she can draw. It is a really good educational things yet they don't even know. The book ring allows for taking cards in and out if the card gets overused. When you write on the letters you can wipe them off with a paper towel dry or wet.
Tuesday, August 24, 2010
Repurposed One Shirt into a New Shirt
Here is the story:
I got a shirt at Kohl's and when I got it, I thought it was cute. It was $4. Not bad. Well, I got it home and tried it on and it reminded me more of nighttime attire. So I had an idea. Make a new shirt. I cut all of the embroidery off the shirt and left the remaining for another project which I haven't quite finished. Anyway, I went and bought my favorite colored tshirt and laid out the embroider appliques onto the neckline area of the shirt. I hand sewed them on. It still needed a little something so I got some ribbon the 1/8 inch type and weaved and twisted and knotted my way through the appliques and across the top of the neckline. After doing this I decided that next time the ribbon needed to be wider. You live you learn right? After I hand sewed the ribbon on I went over it with my sewing machine because it would be sad if all the ribbon came off in the washer. I then had the idea of adding pearls and beads to the shirt to but decided I liked it this way. I love how it turned out and when I wear, I get asked a lot where I got my shirt. That just makes any girl feel good. Right?
This was a little time consuming but I like it and it is unique. Try one for yourself today!
I need some help with the pictures obviously. I am still learning
Monday, August 23, 2010
Runner Rug?
I got this idea from Jen @ Tatertots and Jello. I used placemats, they were what I could find that was the color I wanted and the price. I ended up paying $2 a placemat, I think. I used 4 placemats and put brown woven ribbon on one side and a limey green ribbon on the other side. It was kind of creative sewing and don't look really close. It was hard to get right to the edges of the ribbon on both sides but I did my best. I am all about reversible things so this works great. It is going in my craft/sewing room. When I get done with it I will reveal the whole thing. It is going to be nothing fancy, but is taking awhile to gather all of the things I want.
Sunday, August 22, 2010
Berries are on!
This was actually a few weeks ago but the berries were on and I made jam. It is so delicious and very easy to make.
Here's the recipe:
5 cups mashed berries
1/2 cup corn syrup
3 Tbl clearjel
2 cups sugar
I mix the sugar and the clearjel together and kind of sift it to make sure there are no lumps. Then I add everything else. We love strawberry, raspberry, raspberry with huckleberries in, and blackberry. That is all I have tried. Happy jam making to you.
Thursday, August 5, 2010
beach towel bag
I know, beach towel bags again? This is actually an easy project but hard to explain. I will do my best.
Supplies needed
1 beach towel of your choosing
1 regular towel in coordinating color or not cut in half length wise
1 yard of rope
First lay your regular towel out and fold in half hot dog style. Cut down your fold. I would suggest serging or zig zagging this side to control the fray before you do anything else.
Next you are going to fold over the ends of your regular towel that you just cut in half. Fold over about 2-3 inches. You will be putting rope through this so make it big enough that it will hold it but be fairly easy. When you get that done, pin your regular towel onto 1/4 of your beach towel with the part that you will put your rope through above the towel. Sew the towel on and then fold up the rest of your towel and sew it on. I put my towel on the white side of the beach towel. When all sewed up, fold up beach towel and flip into bag and tada you have a beach towel bag. You can stuff your flip flops and and extra clothes, sunscreen, a book, whatever it is all there.
Have fun at the lake with your new towel.
Saturday, July 17, 2010
Cinnamon Chip Zucchini Bread
This recipe is so yummy. I wanted to share and since it has been so long. Here's to back in the saddle for today! Courtesy of The Prepared Pantry
Cinnamon chip Zucchini Bread
3 cups all purpose flour
1 tsp baking soda
1/2 tsp baking powder
1 tsp cinnamon
1 tsp salt
3 large eggs
2 cups granulated sugar
1 tsp vanilla
1/2 cup sour cream
2 cups grated zucchini
1 1/2 cups cinnamon chips
Preheat oven to 350 degrees. Mix ingredients together, add cinnamon chips at the end. Makes 2 loave pans of the most delicious bread. Bake for 55-60 minutes.
I sprayed my pans and then floured them. After they got out of the oven I let the bread sweat in the pans a little hoping they would all come out and they did. Wonderful!
Cinnamon chips are like mini chocolate chips. You can't eat them plain because they melt at a higher temperature than our body temp. You will probably not be able to find them in a grocery store. I order mine through Alison's Pantry They are about 5.99 for about a pound bag. You can also order the from The Prepared Pantry. Good luck. Also, at Christmas I make regular white bread and at the end add the cinnamon chips. It tastes just like cinnamon burst bread from Great Harvest. My neighbors love me for it.
Enjoy!
Saturday, June 19, 2010
I miss blogging
I miss blogging. I really do like my job but it leaves me with not much time for sewing and crafts. I have lots of ideas but no time. My sewing machine, I call her Sophia and my serger Janie, they are feeling neglected. They want some me time. Summer may be around to stay unless it keeps raining. I have been getting things done non crafty like laundry and dishes and stuff though. I guess that is good it doesn't do anything for the creative right brain. Really the best I can do with the laundry is see how many swirls I can get my soap around the washer agitator. Pretty boring. I am however finishing my craft room. So excited. Right now it is painted and it waiting for the trim to be hung up on the walls, the floor is done and the room is waiting for some magical touches. I got a little cubby like thing at the thrift store that still needs some attention for the fabric and then some decorations. Can't wait, I hope moving day comes soon. Hope you all have a great Father's Day weekend and hope to see you again soon.
Wednesday, June 9, 2010
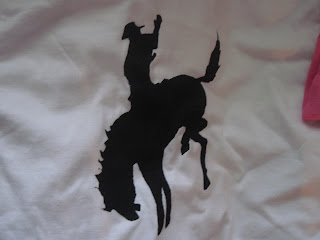
Freezer paper stencils
Here are some more auction items. They are all freezer paper stencils. So fun and they turned out so good. I could make a million, but then what would I do with them all?
Aren't these cool? The tealish colored one looks better than it is.
Subscribe to:
Posts (Atom)