Have any of you noticed the trends with long sleeve shirts lately?
What I am talking about is the sleeves. They look like a short sleeve shirt with a long sleeve underneath in a different color, print, or fabric. Will one day while I was out shopping for winter shirts I noticed this (it was actually months ago). My son has a bunch of summer shirts that aren't quite too small yet and are still useable but next summer they will be too small.
The solution??
Make long sleeves. This is so simple and you can do it no matter what size shirt. Heck, you could do this to your husband's shirts if you wanted too. Mine would be less than thrilled if I did this to his shirts. But nevertheless you can always try.
Here are the directions:
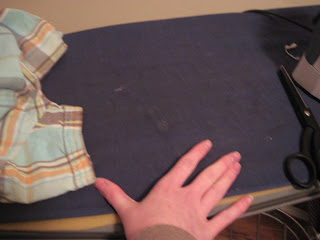
First, pick out the shirt that you want to use. Lay it out flat and measure the opening of the sleeve. So layed flat, if it was 3 1/2 inches wide then you would need 7 inches wide. Then using a long sleeve shirt as a pattern I measured how long I needed the rest of my sleeve. For example, if the sleeve on the short sleeve shirt from the shoulder seam was 4 inches and the sleeve from the long sleeve shirt was 12 inches then you would need to cut your sleeve that you are going to add 8 inches plus 1 inch of overlap for a total of 9 inches.
With all of your measurements ready it is time to start cutting. I went to a thrift store months ago with this project in mind and found men's t-shirts in the the best condition as possible and for cheap as possible. I got most of mine for a buck. I made sure they had neck ribbing on in case I wanted to add ribbing to the sleeves. With that done, I laid the t-shirt out and took my measurements of the sleeve that I wanted and started cutting.
Make sure you cut your sleeve out on a fold so you don't have a seam on top and bottom of the sleeve. I cut my sleeves from the bottom corners of the sleeves so I could use the hem from the bottom of the shirt as the hem for my sleeves. I also tapered the sleeve so that it would be not as wide near the wrist. You can make it the same width all the way down or taper it. Be careful not to taper it too much or it will be too tight.
Once you have your sleeve cut out, turn right sides together and sew starting at the hem and going along the edge. I used a serger. The nice thing about knit is that is doesn't fray. Once I had a sleeve looking thing, I pinned the long sleeve into the short sleeve and sewed around it.
On most all sleeves unless it is not hemmed they have a hem line. I sewed directly on the seam of the previous hem line in a matching thread so you would never know it was added later. Once you have sewed your sleeve on you are done, unless you added the ribbing for the hem. The sewing was a bit tricky and you had to maneuver it carefully so you don't sew the sleeve together.
These turned out so great and I saved money too. Always a plus if you ask me. A beginner could totally do this. It took about 5 minutes start to finish. Happy long sleeving all of your shirts!!
Note: The lighting in my sewing room is really terrible. Waiting for a new light.


This is so perfect. We currently live in Arizona but will be moving in a couple weeks to a much cooler climate. This is a definite "must do" project. Following you from Home is Where My Story Begins. http://diyhshp.blogspot.com/
ReplyDeleteThis is a wonderful idea, and one I've never thought of. It's cute, trendy, and practical :).
ReplyDeletewhat a fantastic idea! thanks for sharing it. Up here in Seattle we wear A LOT of long sleeves!
ReplyDeleteMalia
www.yesterdayontuesday.com
I do this to my kids shirts every season. It makes their clothes go so much further and saves so much money:>
ReplyDelete